Digital
101 Composition
In
conjunction with the Nikon Talk Forum
at DP Review
Composition...
I
was out early this morning. I live about 20 miles from the Buffalo
River, which is the first of the Federal Natural Waterways. It is a
beautiful area and has hiking, fishing, and floating. There are 500
hundred foot bluffs, lots of tourists, and almost as many snakes as
tourists. Of course the snakes are protected and the tourists are on
their own. I hadnít planned on starting a new lesson but you all know
how plans change.
I
was driving thru an area along the river and saw an opportunity to start
looking at composition. As with every other aspect, composition has all
these rules that are general guidelines.
Lets review some of them.
The
first rule you should follow is keep a level horizon. No matter how good
the image if the horizon is not level the image suffers. The next is
anything goes but take the time to change your perspective. If you move
three feet to the left or right or up or down the image changes. If you
change the position of the horizon the image changes.
Composition
is the layout of the image. Next
to exposure, composition will have more impact on your images than
anything else. Take for example kids and pets. They both have one thing
in common they are smaller and closer to the ground. Yet most images of
these subjects are taken from above. Successful composition sometimes
requires you to change your perspective.
Get down to their level and get eye to eye.
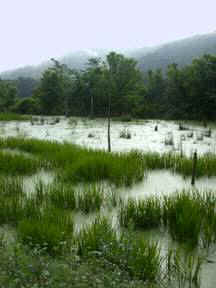
Lets
look at two images I took this morning. The first image was taken of a
overgrown pond with the horizon set high.

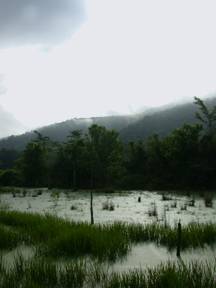
The
image shows depth to the pond and the water by keeping the sky to a
minimum. In the next image I changed the position of the sky. Look how
it effects the image.

Look
how the change in the horizon effects the image. Also notice how this
change effects the exposure.
The
first image I used the grass to base my exposure. The second as I
increased the presence of the sky it effected the exposure and I let it.
In my last series about exposure I discussed why I use manual exposure
and this is a good example. The first image I zoomed in on the reeds in
the pond. I set the exposure using the manual mode. When I recomposed
the image the exposure did not change. You can also use the exposure
lock if your camera has one.
The
second image I shot automatic knowing what the bright light would do to
the image. In the composition you now get confused because you donít
know what is important the pond area or the sky. Thus brings up a
important point of composition. Determine the subject and compose the
image to enhance the subject not the background.
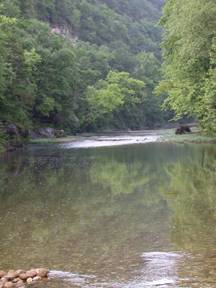
Two
more examples show how changing the angle changes the image.
In this first image I wanted to show depth to the stream and
catch the reflection on the water so I put the stream in the center.

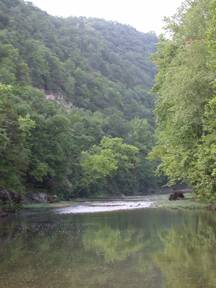
In
the next image I put the stream lower in the picture to include a little
sky and more of the tree line. I also followed the rule of thirds, which
divides the horizontal and vertical into thirds. If you draw two lines
the first one third into the vertical or horizontal and the second two
thirds you divide the image area into thirds. It is suggested that the
subject should intersect one of the points where the lines cross. In
this image where the water levels out it is about one third into the
picture area from the bottom. I
like the second image as it stills shows some depth to the water but
also shows the heights of the hills along the stream. In the next couple
of lessons I will include more samples and discuss composition.

From
this lesson I hope you learn to look at composition from all angles.
Practice taking an image from five different angles, some low some high,
some near some far. Then look at each image and how the image is
effected by these changes. Remember one of the main advantages of
digital is we see what we get now.
By doing this you will develop your photo eye and thus your
quality images will increase.
Troutman
Click
here to discuss this tutorial on the Nikon Talk Forum at DPReview...
